Using ffmpeg to Recreate Watermark Shortcuts
Erhua Li / 2023-09-24
Basic Commands
We have two tools to complete our goal.
Using exiftool:
# Install exiftool using homebrew
homebrew install exiftool

# Get aperture, shutter speed, ISO etc information
exiftool image.jpg

# Get GPS information
exiftool -gpslatitude -gpslongitude image.jpg

# Get TIFF information
exiftool -tiff image.jpg
Using ffmpeg:
# Get exif information of image
ffmpeg -i picture_name
# picture_name is the name of the image file (needs extension)

# Get aperture, focal length, ISO etc information
ffprobe -v quiet -print_format json -show_entries stream_tags=lens,aperture,iso input.mp4

# Generate blank image
ffmpeg -f lavfi -i color=c=white:s=7008x5490 -frames:v 1 output.png
# white is background color, can be black, red etc. 7008x5490 is image dimensions.
# output.png is output file path and name.

# Overlay image and color box
ffmpeg -i input.jpg -filter_complex "color=c=blue:s=200x200 [color]; [0:v][color] overlay=100:100" output.jpg
# s=200x200 is size of color box, blue is color, can use #00FF00 etc.
# 100:100 is overlay start position.
# This inserts a blue 200x200 box at (100,100) of original image.
# Example: ffmpeg -i ./result.jpg -filter_complex "color=c=#545454:s=200x200 [color]; [0:v][color] overlay=100:100" result_color.jpg
# Can also use rgb(255, 0, 0) for color

# Overlay image on image
ffmpeg -i background.png -i input.jpg -filter_complex "overlay=10:10" output.jpg
# background.png is background image, input.jpg is foreground image,
# output.jpg is output file path and name

# Overlay text
ffmpeg -i input.jpg -vf "drawtext=text='your-text-input':x=100:y=5000:fontsize=24:fontcolor=white" result.jpg
# input.jpg is input image, your-text-input is text to overlay,
# x, y are position, fontsize is font size, fontcolor is color,
# result.jpg is output file path and name
ffmpeg -i input.mp4 -vf "drawtext=text='Your Text Here':x=100:y=100:fontsize=24:fontfile=/path/to/your/font.ttf" output.mp4
# Can specify font file to use different fonts

# Overlay multiple text
ffmpeg -i input.mp4 -vf "drawtext=text='Text1':x=100:y=100:fontsize=24, drawtext=text='Text2':x=200:y=200:fontsize=24, drawtext=text='Text3':x=300:y=300:fontsize=24" output.mp4

# Overlay image, text
ffmpeg -i background.jpg -i input.png -filter_complex "[0:v][1:v]overlay=10:10,drawtext=text='Your Text Here':x=20:y=H-50:fontsize=24:fontcolor=white" output.jpg

# Overlay image, multiple text
ffmpeg -i background.jpg -i input.png -filter_complex "[0:v][1:v]overlay=10:10,drawtext=text='Your Text Here':x=20:y=H-50:fontsize=24:fontcolor=white, drawtext=text='Text2':x=200:y=200:fontsize=24" output.jpg
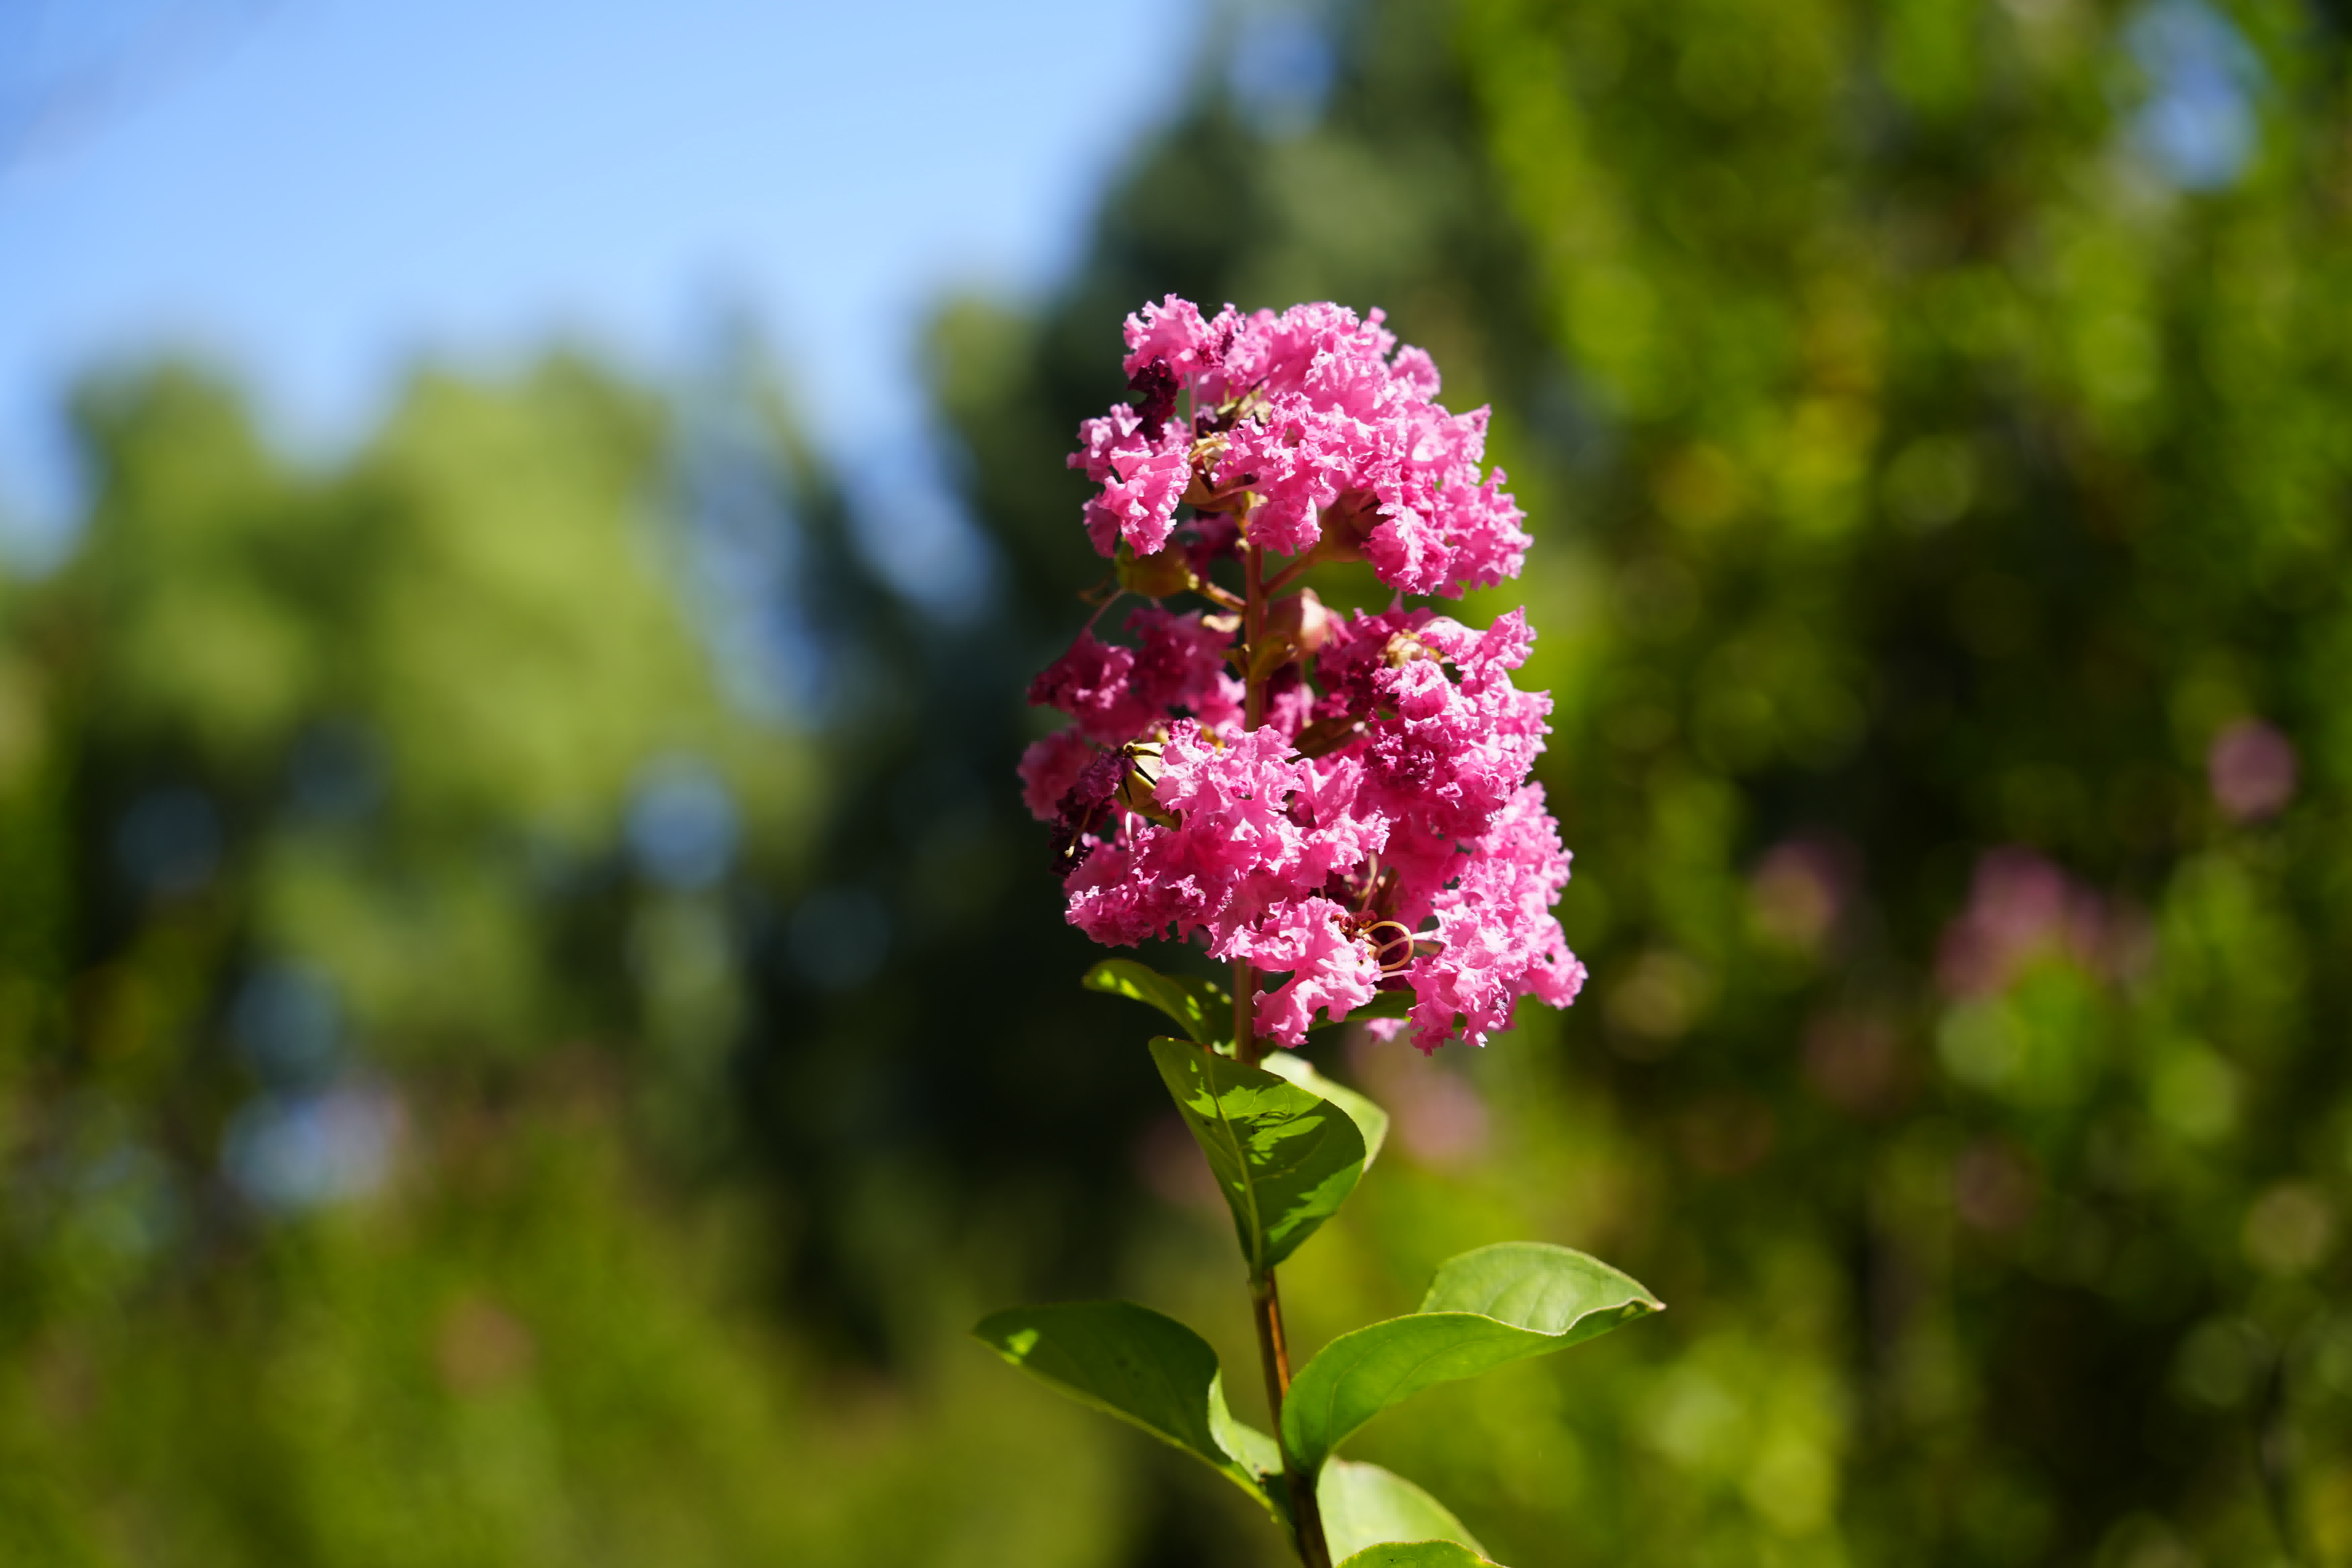
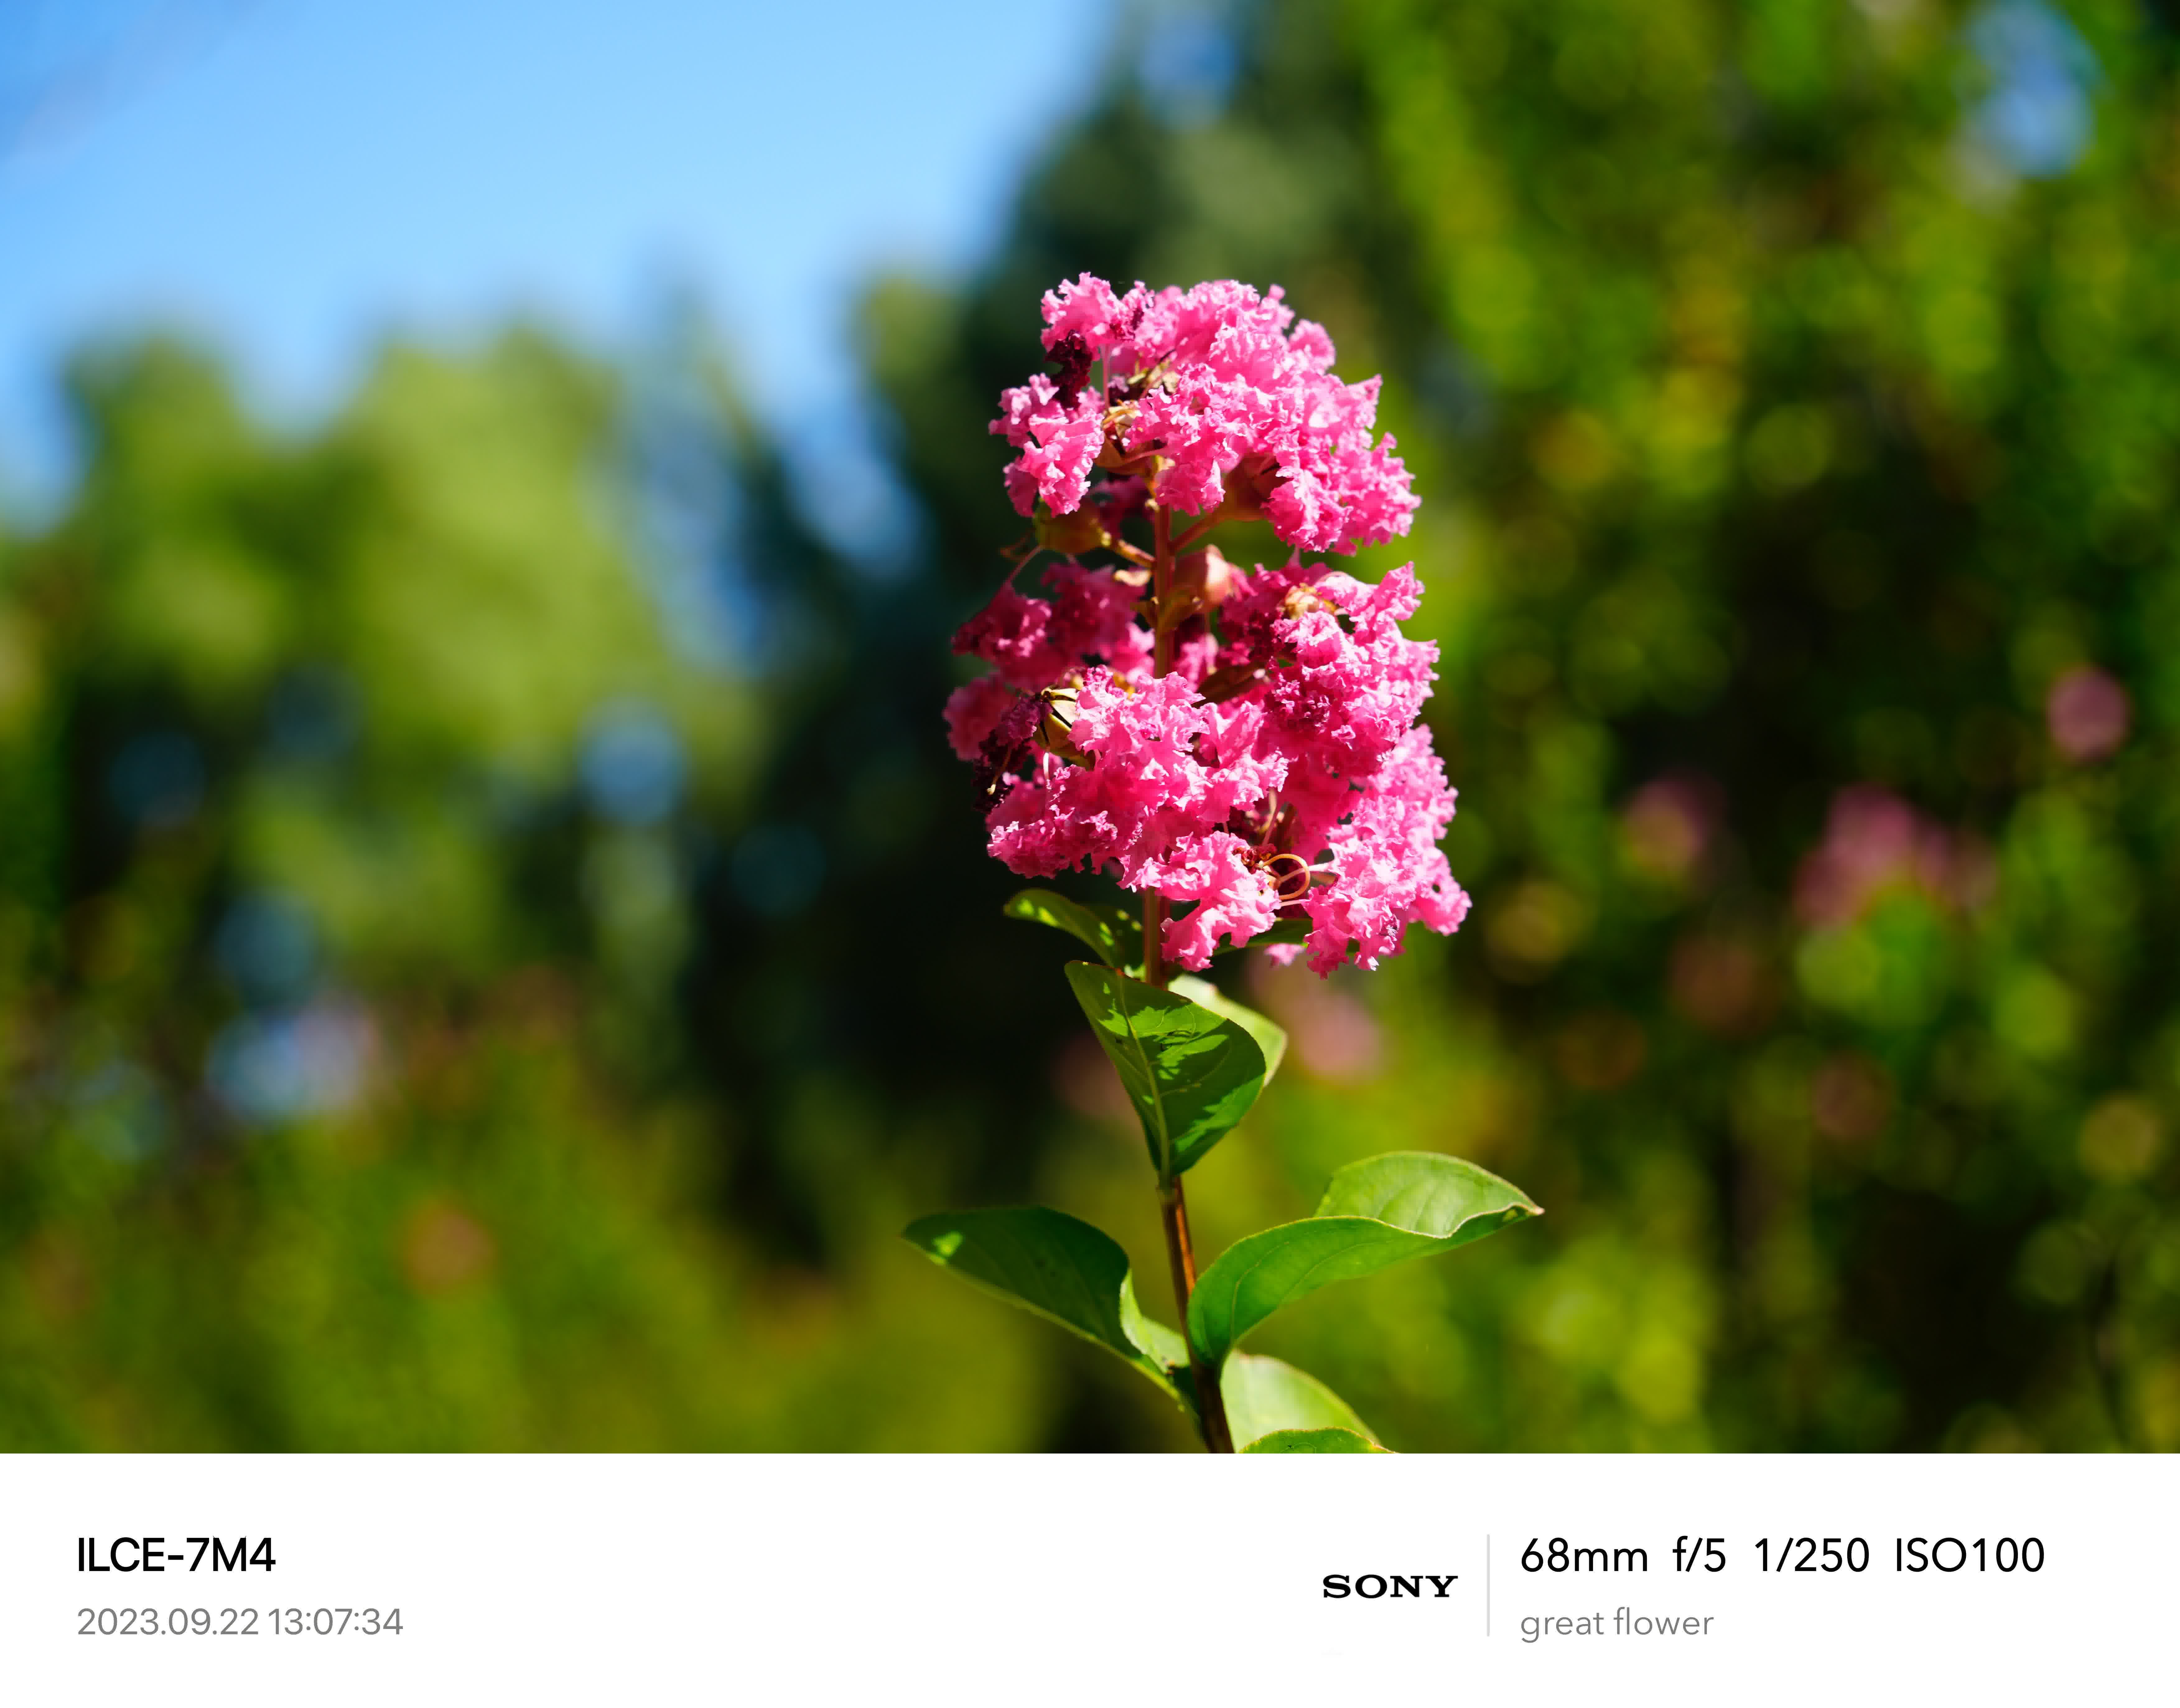
Objective
Convert the image below using ffmpeg to the image below it:
Steps
Originally wanted to process completely in shell scripts, but found handling some exif info in shell would be tedious, so used Python for the text logic, and glued together commands from ffmpeg and exiftool.
Basic Image Info
Sony images are 7008 × 4672 pixels, shortcut images are 7008x5490 pixels.
Mapped out approximate relationship in AutoCAD, and determined acceptable scaling ratios:
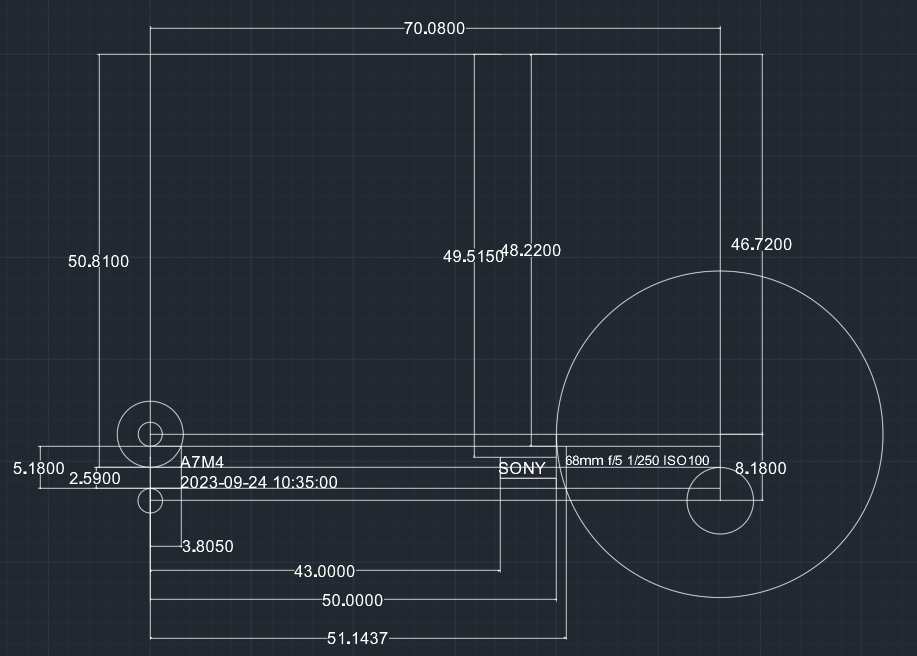
The positional relationships are complex, with additional special handling needed for vertical direction.
Script Steps
Basically follows the steps from a good image solution, abstracting many methods into reusable function APIs.
.
├── README.md
├── config.py   // Configuration file
├── font_finder.py // Font selection for different OSes
├── generate_links.py  // Image to uploaded file mapping
├── logger.py   // Logging module
├── pic_compress.py  // Image compression
├── pic_ffmpeg.py    // ffmpeg image ops API
├── pic_upload.py    // picgo image hosting upload API
├── pic_watermark.py  // Watermark generation flow
├── requirement.txt   // Non-builtin Python dependencies
├── run_camera.sh     // All-in-one script for camera images (compress, upload, watermark, link)
├── run_normal.sh     // All-in-one script for normal images (compress, upload, link)
├── run_picture_compress_all.sh  // ffmpeg shell compression entry 1
├── run_picture_compress_small.sh  // ffmpeg shell compression entry 2
├── run_picture_compress_thumb.sh // ffmpeg shell compression entry 3
└── utils.py  // Utilities
References: